Saturday, February 27, 2010

Thank Goodness for Blogs!!

Last night around 7, I was checking some of my favorite blogs, while my husband was cooking a pizza in the oven. When I checked one of my favorite cooking blogs Becoming Betty where Rachel had just put up a post about this little "backyard" restaurant. Talking about the great carne asada tacos, just like the ones from the little stands in Mexico. Now I LOVE little tacos like that, one of my favorites places is a little stand at the Alley's in Cali.

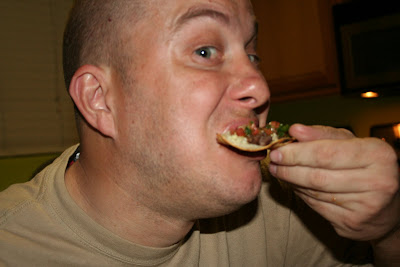
So I started telling my husband about it since I knew he would totally be into it too. Well not only was he INTO it, but he got up and said "k I am going, you want some". Ummm, we were cooking dinner so no. But he didn't seem to care, he had the itch and he decided to scratch. So long story short. He went, We Got and We LOVED!
We tried all three kinds and they were all to die for. The sides were the best and they came free. This whole meal was $11 and we were STUFFED! I think they are each about $1.50.

(This is an insert from her original post)
They are open on Friday and Saturday nights starting at 6:30pm. They serve carne asada tacos, carne asada quesadillas, and carne asada gorditas. They also have these amazing sauces to put on top.

No rice and beans. No chips and salsa. Just amazing carne asada.

*Directions: Go north on Stapley from Southern. Turn left on 8th. (First light after Southern). Take first left on Spencer. (Tree blocking sign). It's the first house on the left with white, metal, decorative fence. Find a place to park (good luck) and walk right into the backyard. Rueben will take your order. See you there!

If you went to Mesa High it is right behind M&M, which I know all you jackrabbits know where that is.

Friday, February 26, 2010

Rich & Creamy Angel Hair Pasta

My SIL- Suzy introduced me to this recipe about 5 yrs. ago on our beach trip and I have been in LOVE ever since. First off it is soooo easy, a One Pot Wonder. Plus it is unlike any other pasta dish I have ever had, it's super rich and full of flavor. It is always a crowd pleaser, plus the kids go ga ga for it.
So when you are looking for a quick and easy meal that makes you look great, this is it.


Angel Hair Spaghetti Pasta

Cook 3 Hours in crockpot:
5-6 frozen (boneless) chicken breasts
Spaghetti mix pkg. (2)
Mushrooms ( 1 8oz can)
Cream cheese ( 1 pkg)
Chicken broth (1 can)
Butter ( 1 cube)
Then add in Angel Hair Pasta or serve on top of . Enjoy

Tuesday, February 23, 2010

Just Plain Stuffed!

Since as I was a little girl I have been going to visit my Dad's family in Pennsylvania. One of my favorite memories of my Great Grandma Ann is her Stuffed Cabbage. It is a Ruttinger family favorite. I even have video of her teaching my dad how to make it. (she was the cutest little grandma ever) After I got married I learned how to make it and have been perfecting it ever since. My family has also developed a love for it as well.

Now this may sound like something you may not want to try, but please give it a chance. It is such a yummy comfort food, try making it just once and I am almost positive you will like it (if you like ground beef and rice that is)
Start it off by boiling a head of cabbage, once it starts coming apart take it out, and lay the leaves out to dry.

Then make some rice and add it to some ground beef ( and a little sausage) along with an egg, salt and pepper and a little garlic powder. ( you want more meat than rice or it will be too dry)
then put a little bit of mixture into a leaf and roll it up like a burrito
It should look something like this.

Then add the sauce and remaining cabbage on the top
I had my Uncle, and Grandpa over last night and they devoured it, as did everyone else.
So Hip Hip Hooray for Stuffed Cabbage!!!!


Stuffed Cabbage

1 large head of cabbage(boiled and dried)
1.5 lbs of ground beef ( cooked and drained)
a little bit of cooked sausage ( if you like)
1 1/2 C. of cooked rice
2 small cans of tomato sauce
1 can of tomato soup
garlic powder & salt & pepper to taste
1 egg

In a large pot of boiling water put in a whole head of cabbage (cored) when it the leaves start to come off take it out, let it cool and then lay the leaves out on a towel to dry. While they are drying start cooking rice. Then brown the meat. When they are both done put meat, rice in a bowl with an egg, salt,pepper & garlic powder to taste. Next in a bowl mix the sauce and soup with a little bit of water to thin it out a bit. Then scoop some of the meat mixture into a leaf and roll up like a burrito. Place in casserole dish ( with a little bit of sauce on the bottom) continue rolling leaves. After done sprinkle any leftover cabbage on top then pour sauce over it. Cook for about 60-90 min. at 350degrees. Serve with some good bread and Enjoy.

Monday, February 22, 2010

THE SEARCH IS OVER!!!!

8 yrs. ago I fell in love with the Chocolate Chip Cookie from Joe's Real BBQ (more on them another time). It is both mine and my husbands favorite cookie, it costs $1 and is sooo worth it. It is thick & chewy and always warm. I have always been on the hunt for a recipe to duplicate this cookie and have never found one, until NOW! I was on a great cooking blog which always has Great recipes and I was looking for something yummy to make for our traditional Sunday baking time. When I came across a recipe that was entitled Thick and Chewy Cookies. HELLO! so of course I read up and she talked about how this is probably her favorite cookie.

The recipe is quite a bit different from most choc. chip cookie recipes, first you melt the butter ( weird, right) then it calls for one egg and one egg yolk, it also has a minimal amount of flour.
I was a little worried that they wouldn't turn out, but they did and they were perfect, exactly like my fav. Joe's cookie. Now instead of driving down and paying a dollar for one I can just make my own. So please try this recipe and see for yourself how delicious they are.
I made some Extra big, just like they serve them up at Joe's.


Thick and Chewy Chocolate Chip Cookies
From Cook's Illustrated
Makes about 30 cookies

2 1/8 c bleached all-purpose flour (about 10.5 oz)
1/2 t table salt
1/2 t baking soda
12 T unsalted butter, melted and cooled slightly (I don't use unsalted butter because I never buy it - salted butter works just fine in this recipe when I use it!)
1 c brown sugar (7 oz)
1/2 c sugar (3.5 oz)
1 large egg
1 large egg yolk
2 t vanilla
1-2 c chocolate chips (I use a full 12 oz. package of semisweet chips)

Heat oven to 325 degrees. Adjust oven racks to upper- and lower-middle positions. Mix flour, salt, and baking soda together in medium bowl; set aside.

Either by hand or with electric mixer, mix butter and sugars until thoroughly blended. Mix in egg, yolk, and vanilla. Add dry ingredients; mix until just combined. Stir in chips.

Form dough into balls (I use my handy-dandy cookie scoop - the original recipe has intricate dough-forming instructions so go here if you want to do it that way) and place on parchment or silpat-lined cookie sheets. Smaller cookie sheets can be used, but fewer cookies can be baked at one time and baking time may need to be adjusted. (Dough can be refrigerated up to 2 days or frozen up to 1 month—shaped or not.)

Bake, reversing cookie sheets’ positions halfway through baking, until cookies are light golden brown and outer edges start to harden yet centers are still soft and puffy, 15 to 18 minutes (start checking at 13 minutes - these cookies really do need longer baking time than most average cookie dough recipes). Frozen dough requires an extra 1 to 2 minutes baking time. Cool cookies on cookie sheets. Serve or store in airtight container.


Do You Love Your Neighbor?

YES!!!!!
I love my neighbors. Yesterday my neighbors came to borrow my blender and This is what they came back with! Fair trade I would say.
Who doesn't like homemade salsa.

Thursday, February 18, 2010

Go make yourself a dang Quesa-"Dilla"

Dinner tonight was adapted from a recipe from Picky Palate found here. Now I loved this recipe but I decided to make it it a little different.
I cooked up some steak seasoned with some lawrys salt, pepper and a couple of cloves of cracked garlic, in the crock pot till it got good and tender ( about 5 hrs.)
It always amazes me when I put in some meat with no liquid and a few hours later it is swimming in broth.
When the steak was almost ready I decided to make some Homemade flour tortillas.
I got the recipe from a food storage cookbook and it is so easy.
It starts by mixing some oil, flour, and salt with your fingers till it is nice and crumbly.
then adding some warm water and work it with a fork till you get some large clumps.
Then you knead it with some flour for a couple of min. till it is smooth.
then cover it with plastic wrap for 30 min. to rest.
Next up I started on the corn salsa.
Now this is basically the same as PP, but I also added green onions and would normally add some black beans but I was out.
Next I cut up some Gorgeous avocados.
When the dough had rested I formed it into little balls a little bigger than a golf ball.
then roll it out till it is paper thin starting from the middle to make it a circle. I am not the best at a circle it takes too much patience.
It will get way smaller when you put it on the hot pan. Once it starts bubbling flip it over for another little bit and then your done.


after that I put some goat cheese and monterey jack on a tortilla loaded it up with some steak, grilled it and then put the salsa on top. It was sooooo goood! I also had some homemade tortillas and honey butter.mmmmm. which I got from one of my favorite restaurants in California called El Torito Grill they serve up fresh homemade tortillas with honey butter at your table instead of chips. I swear I fill up on those every time they are so dang good. They're other best thing is their Fire Roasted Tomato soup, which I have always wanted to try and make ( I will have to get on that).


Recipe for Tortillas
2 C. all purpose flour
1/2 tsp salt
1/4 C oil
2/3 C warm water

Rub flour, salt and oil together with your fingers until completely incorporated and fine crumbs form. Pour water into dry ingredients and immediately work it in with a fork. Dough will be in large clumps. Sprinkle with flour and knead until smooth, about 2 min. Divide dough into 12-15 portions and shape into balls about 2 inches in diameter. set dough balls on a plate, cover with plastic wrap and let dough rest for at least 30 min. before baking. You may also let dough rest in a bowl, covered with plastic wrap, before shaping it into balls. Roll out to paper thin, rolling from the center to the outside. Bake on a very hot ungreased griddle until freckled, about 20 seconds on each side. Serve warm.
*for sweet tortillas add 2 Tbsp sugar to flour.


Recipe for Steak Quesadilla

any steak or beef roast seasoned with lawrys salt, pepper and garlic , cooked in crock pot till tender (about 5-6 hrs.)
Goat cheese and Monterey Jack (or whatever cheese you like best)
Avocado (smashed and rubbed on top is best)

Tomato, Corn & Bean Salsa
sliced grape tomatoes
white corn
chopped cilantro
chopped green onions
black beans (drained and rinsed)
fry it all up with a little oil and salt and pepper in a till it gets a little tender


Sauce

If there is anyone still out there who hasn't been to Sauce, you NEED to go!
First time I went I fell in love with it, the place is very NY chic- you go and order and then find a table. Their menu consists of pizzas, pasta, salad and sandwiches.
I will start with the pizza. They are thin crust, yet chewy ( which I love) my 2 favorites are the "Chicken Caesar Salad" pizza, which is just like it sounds, salad on a pizza. It is yummy and super filling ( plenty to share). Their chicken which is in most of their dishes is so good, it's shredded and tender. My other favorite is the "Sausage and Carmelized Onion" pizza. It is sooo sweet and juicy. Oh how I love this one. ( I am definitely going to attempt making this at home)
Next is the pasta, I have only tried the "Chicken and Broccoli, which comes with the big shell noodles and sauce that they use in their "Mac & Cheese" (which is also great). It is really good, even my kids were gobbling it up.

Lastly their Salads, my favorite is the "Chicken, Pine Nut & Gorgonzola" salad ( I have also substituted mozzarella balls for the gorgonzola before and that is perfecto) This salad is very filling and has so many great flavors plus their isn't a lot of dressing and it doesn't need it.

They have their lunch special right now from 11-4 which is $7.50 for a drink and 2 meals of either soup/salad/pasta. They are smaller portions but it is still a ton of food. I went today with my husband and we shared a lunch special between us and our 2 littlest ones and were stuffed.

This place is also not to expensive most everything is under $10 and I always go with someone and share. I hope this little spiel has convinced you to try it. Happy Eating!

Wednesday, February 17, 2010

Food for the masses

Last night I volunteered to take dinner to 2 families in the ward, it was also Tuesday night which is the night my uncle and g-pa come for dinner. We also had a few other guests that showed up. So I thought what meal would be the easiest to make and distribute in large quantity plus have all the goods in it. Chicken Pot Pie, its got veggies, chicken and bread so I only had to make one dish. My new favorite recipe for this is from Picky Palate it is a biscuit topped pot pie which is my fav. since I don't like pie crust.

I forgot to take a picture of the finished result, luckily I got one right before the last of it got eaten up.


Here is the shredded chicken mixed with ranch dressing packet mix. I just boil my chicken and shred it, super easy.

Then I layered some frozen veggies down, ( PP recipe calls for canned but whatever you like will do)

Then some chicken and then you pour over the mix of soups, milk and broth. I never use the cheese soup it calls for since I never have it and it still turns out great.
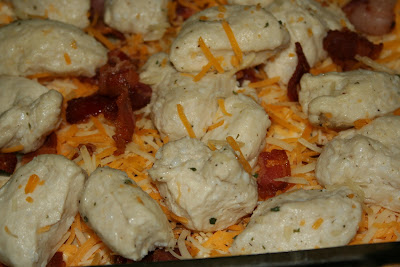
Then the cheese, bacon and biscuit pieces ( also tossed with some ranch mix) and pop it in the oven- super simple.
The result- GONE! everyone loved it and there was not a bite leftover :( sad for me since I was hoping for leftovers the next day for lunch. But there is nothing better than making a meal that everyone eats right up.

Poppin’ Garlic Ranch Biscuit Topped Chicken Pot Pie

4 large chicken breasts, cooked and shredded (either bake, crockpot or pressure cook chicken for easy shredding)

1 packet dry Ranch Dressing Mix, reserve 1/2 teaspoon for topping

1/2 teaspoon salt

1/4 fresh cracked black pepper

2 10 oz cans cream of chicken soup

10 oz can cheddar cheese soup

1 Cup chicken broth

1 Cup milk

2 15 oz cans Mixed Veggis, drained

3/4 Cup crumbled bacon pieces, already cooked

1 Cup shredded cheddar cheese

1 6 count can Pillsbury Homestyle Biscuits

1/2 teaspoon Lawry’s Garlic Salt

1/2 teaspoon reserved dry Ranch Dressing Mix

1/2 Cup shredded cheddar cheese

Cholula Hot Sauce to top, if desired

1. Preheat oven to 350 degrees F. Place shredded chicken into a large mixing bowl. Sprinkle in ranch mix (reserve 1/2 teaspoon for later), salt and pepper. Toss to combine seasonings.

2. In a large rimmed skillet or dutch oven, place soups, broth and milk over medium heat; whisk until combined. Stir in mixed veggis then shredded chicken. Transfer to a large 9×13 inch baking dish sprayed with cooking spray. Sprinkle bacon and cheese over top.

3. Open biscuits and place onto wax paper. Cut each biscuit into 10 little triangle pieces (cut biscuit in half then cut each half into fifths). Place little pieces of biscuit over top of chicken mixture until it’s all covered. Sprinkle biscuits with remaining ranch dressing mix, garlic salt and 1/2 Cup cheese. Bake for 40-50 minutes or until golden brown and biscuits are cooked through underneath. Cover with foil the last 25 minutes of baking to prevent too much browning. Let cool for 10 minutes then serve. Serve with Cholula hot sauce if you like it spicy! Enjoy.


for dessert I made a favorite chocolate/pb number that my friend Kate introduced me too. It is sooooo good, best part no baking! I reminds me of those peanut butter chocolate cup things that I used to get in elementary school ( that was always my favorite day)
Peanut Butter Bars

1 pkg. + 2 crackers - graham crackers - coarsely crushed
2 1/2 cups powdered sugar
1 cup butter, melted
2 cups crunchy peanut butter
2 large milk chocolate Hershey bars + 1 cup chocolate chips, melted

Mix graham crackers and powdered sugar. Add melted butter, then add peanut butter. Spread mixture in jelly roll pan. Melt chocolate and spread over peanut butter mixture. Cool in refridgerator or freezer until chocolate hardens. Serve cool.

Sunday, February 14, 2010

A super sweet Valentine's Day!

So for a treat to pass out this year for V-day I decided to try something new ( of course) and attempted a Meltaway Meringue Heart Cookie from this awesome blog. Now I have never made meringue, in fact it is on my "to do food list". So I was a little nervous and also since I have never even tried meringue.
It started out simple crushing some peppermint.
Next I attempted making "hard peaks" from an egg white mixture. I am hoping I got it to the right stage, this is what it looked like.
after that I put it in a bag to make it easier to pipe out hearts
here I am trying to have perfect precision, while an 18mo. old is literally hanging on me.
they seemed to turn out pretty good despite the "extra weight"

after I cooked them forever and then let them sit over night, I made some melted chocolate. The recipe didn't say which kind to use so i just used some bittersweet chips and chocolate bars, but it never really set. So I think next time I will try sticking with almond bark.
then I dipped

and dried, like I said earlier it never really set up, and stuck to the wax paper so I decided to make them sandwich cookies. Scraping up the chocolate and smearing it between 2 hearts. Hey work with what you got!
They look pretty cute, right?
My analysis is that I don't love meringues, though I do think they are pretty goo and really different ( also very low in calories).

Meltaway Meringue Heart Cookies (makes 24-30)
Ingredients:
3 large egg whites
1/4 tsp. cream of tartar
1/4 tsp. salt
3/4 c. C & H white sugar
red food coloring
crushed candy canes (about 1/4 c.)
Melted chocolate (your favorite kind)
Parchment paper or Silpat mat

Directions:
Preheat oven to 200 degrees. Whip egg whites, cream of tartar, and salt in mixer until soft peaks form. Slowly add sugar and a few drops red food coloring. Beat until stiff peaks form and mixture is smooth and glossy (about 5 minutes).
Line a cookie sheet with parchment paper or Silpat mat. Put mixture in a pastry bag or gallon ziploc bag with a corner snipped off. Pipe out thick hearts (to make them thicker I ended up drawing one heart then another one on top of it) onto your cookie sheet and sprinkle with crushed candy canes. Bake at 200 degrees for 1 1/2 hours. Then, turn off oven and leave meringues in the oven to completely cool (overnight is best).
Next, melt your favorite chocolate (I used Peters Burgundy) and dip the bottoms of your cookies. Set on wax paper to dry.
When completely set, remove from wax paper and serve! You can also store them in an airtight container for up to 6 weeks.


For Valentines Day I made my family my favorite
Chocolate Chip Heart Pancakes - because every meal on V-day should have a little chocolate!

I always use the recipe from "The Fat Sisters Cookbook" and then add some choc. chips, it is super easy.

Pancakes
1 egg
1 c. milk
2 Tbsp. veg. oil
1 c. flour
1/2 tsp. salt
1 Tbsp. baking powder
1 tsp. sugar ( optional)
Beat egg; add oil and milk and mix. Add dry ingredients and mix until almost smooth.

Here are the Valentine's my boys made last night at "Kids Night Out" at USA gym.
How sweet.
Yes my shaping is terrible.
For my husbands V-day Sweet, I decided on a Red Velvet. ( He loves the Red Velvet cake from Liberty Market so I tried to replicate that) I found a recipe that seemed like it might work.

Here is the Entire bottle of food coloring I dumped into the batter!
Looks "bloody" good right?

Greasing and flouring my pans- to make sure it came out PERFECT
I wanted this cake to turn out so good I even "sifted" which I never do.
Ta DA
How tasty does that look?
Cuz it was GREAT! I hope you all had a Sweet Valentines day as well.


Red Velvet Cake (from the food network)

Ingredients

  • Vegetableshowlist_icon.gif oilshowlist_icon.gif for the pans
  • 2 1/2 cups all-purpose flour
  • 1 1/2 cups sugarshowlist_icon.gif
  • 1 teaspoon baking soda
  • 1 teaspoon fine salt
  • 1 teaspoon cocoa powder
  • 1 1/2 cups vegetable oil
  • 1 cup buttermilk, at room temperature
  • 2 large eggs, at room temperature
  • 2 tablespoons red food coloring (1 ounce)
  • 1 teaspoon white distilled vinegar
  • 1 teaspoon vanilla extract
  • Cream Cheese Frosting, recipe follows
  • Crushed pecans, for garnish

Directions

Preheat the oven to 350 degrees F. Lightly oil and flour 3 (9 by 1 1/2-inch round) cake pans.

In a large bowl, sift together the flour, sugar, baking soda, salt, and cocoa powder. In another large bowl, whisk together the oil, buttermilk, eggs, food coloring, vinegar, and vanilla.

Using a standing mixer, mix the dry ingredients into the wet ingredients until just combined and a smooth batter is formed.

Divide the cake batter evenly among the prepared cake pans. Place the pans in the oven evenly spaced apart. Bake, rotating the pans halfway through the cooking, until the cake pulls away from the side of the pans, and a toothpick inserted in the center of the cakes comes out clean, about 30 minutes.

Remove the cakes from the oven and run a knife around the edges to loosen them from the sides of the pans. One at a time, invert the cakes onto a plate and then re-invert them onto a cooling rack, rounded-sides up. Let cool completely.

Frost the cake. Place 1 layer, rounded-side down, in the middle of a rotating cake stand. Using a palette knife or offset spatula spread some of the cream cheese frosting over the top of the cake. (Spread enough frosting to make a 1/4 to 1/2-inch layer.) Carefully set another layer on top, rounded-side down, and repeat. Top with the remaining layer and cover the entire cake with the remaining frosting. Sprinkle the top with the pecans.

Cream Cheese Frosting:

1 pound cream cheese, softened

4 cups sifted confectioners' sugar

2 sticks unsalted butter (1 cup), softened

1 teaspoon vanilla extract

In a standing mixer fitted with the paddle attachment, or with a hand-held electric mixer in a large bowl, mix the cream cheese, sugar, and butter on low speed until incorporated. Increase the speed to high, and mix until light and fluffy, about 5 minutes. (Occasionally turn the mixer off, and scrape the down the sides of the bowl with a rubber spatula.)

Reduce the speed of the mixer to low. Add the vanilla, raise the speed to high and mix briefly until fluffy (scrape down the bowl occasionally). Store in the refrigerator until somewhat stiff, before using. May be stored in the refrigerator for 3 days.


Related Posts Plugin for WordPress, Blogger...