Showing posts with label snack. Show all posts

Wednesday, November 2, 2011

Homemade Butterfingers

I have always loved Butterfingers, but lets face it there are a couple of problems with them. First they get stuck in your teeth and never come out and Second they make a huge mess! Well what if I told you I could solve those problems and still give you the flavor you love. Interested?? If you aren't than you are not a Butterfinger fan and therefore do not need to read the rest of this post.

I found this gem on Pinterest (where else!) and knew it would be perfect for the "Pinterest" party my SIL was having, where we were all supposed to bring our favorite Holiday treat that we saw on Pinterest. Fabulous Idea right?! I saw these 3 ingredient Butterfingers and knew that they were going to be a crowd pleaser. Was I right, um Heck Yeah I was!!! I think every single person asked how to make them.


So here it is

1 lb. of Candy Corn ( yeah crazy huh)
1 160z jar of creamy peanut butter
1 package Chocolate Almond Bark

Melt the candy corn in a microwave bowl stirring at 30 second intervals. You could also use a double boiler. Once melted add the peanut butter. The candy corn will most likely seize up so you will probably need to microwave for another minute. Stir it together and once it incorporates place it into a 8x8 dish lined with tin foil ( you could also us a 9x13 if you want your bars thinner.) let them chill in fridge till set and cold. Then cut them and dip in melted chocolate. It's messy and hard to get pretty but it don't matter!


Wednesday, October 26, 2011

No-Bake Energy Bites

I saw these on Pinterest and new immediately I would be whipping up a batch. What I didn't know is that it would only take 5 min. and not only that but that they would be SUPER Delish! The kids think they are cookies and everyone else doesn't care what they are. But that doesn't stop them from dropping by and stealing a handful of them out of my fridge. These are the perfect low calorie pick me up little snack, that you can make specific to your tastes.

This recipe is how I like them made.

No Bake Energy Bites
adapted from Smashedpeasandcarrots.blogspot.com

2/3 cup peanut butter
1 cup quick oats
1 cup shredded coconut (sweetened or not)
1/2 cup mini chocolate chips
1/2 cup Wheat Germ
1/3 cup honey
1 tsp. vanilla

Mix in a large bowl, then drop onto a lined cookie sheet using a cookie scooper, and chill for about an hour. Keep in an airtight container in the fridge. ( If they last that long!)

Monday, May 23, 2011

Microwave Monkey Bread

Now everyone I know has had some version of Monkey Bread. You can even get a mix at Williams Sonoma. But my family definitely grew up on the Ghetto Version. My mom got this recipe from Homemaking night and we have been using it ever since. It would almost always make an appearance at Family Home Evening. The thing we love the best about it is that it takes literally no preparation or forethought and about 5 min. to make, all in the Microwave. But if it isn't darn good! Everybody loves it and the kids can even make it themselves. So if you need a fast dessert this puppy is definitely your man!


Microwave Monkey Bread

1/3 cup dark brown sugar
1 T. water
3 T. butter
1 pkg of refrigerator biscuits ( the small biscuits)
1/2 cup chopped nuts (optional)

Mix sugar , water and butter in a large pyrex bowl. Cook in microwave for 2 min. Add biscuits & nuts & insert small juice glass in the center of the bowl. Cook 2 min. and let stand 2 min. Remove glass and invert on a plate. .

Thursday, March 31, 2011

Goldfish


While trying to plan something for the kids play group I came across this great idea from Oopsey Daisy.
I first read the book to them.

then let them go at it. Most of them got the concept
and a couple of them just asked if they could eat them!


Friday, January 14, 2011

Quesadilla Dogs

Last Summer we took a trip to Atlantis, everyday at the pool my dad would order a bunch of stuff and this was always one of the things. We all went crazy for them, maybe we were really hungry but they were really good. So when I got home I tried recreating them.


Super easy:
throw some cooked dogs onto a bed of cheese in a tortilla
top with more cheese, roll up and fry. O.k. so I didn't say they were the healthiest lunch, but they are a yummy spin on an old classic. Just pair with a nice dipping sauce and Voila.


Tuesday, December 14, 2010

Progressive Dinner

We have been doing Progressive Dinner with the Cummards for awhile now. This was my family's first year to do it. It is such a fun way to see everyones Christmas Decor while enjoying AMAZING food! My family sure knows how to bring it.

The first house was appetizers with Hayley & Brett the newlyweds!
She made spinach and artichoke dip & , jalapeno jelly with cream cheese.
Brett decided to get fancy and made this super Delicious Brie En Croute, I have been seeing this everywhere but didn't really think I liked Brie, well I was wrong this puppy was to die for. The puff pastry was stuffed with brie, pecans and brown sugar - Hello this was almost dessert and dang good. Also could it look any fancier. If you are looking to impress this is the way to go.

Ingredients

(adapted from Martha Stewart0

Serves 12 to 16

  • 1/2 cup pecan halves
  • 1/2 cup packed dark-brown sugar
  • All-purpose flour, for dusting
  • 2 standard packages (17 1/4 ounces) frozen puff pastry, thawed
  • 1 wheel (2.2 pounds) Brie
  • 1 large egg yolk
  • 2 tablespoons heavy cream

Directions

  1. In a medium bowl, combine pecans and sugar, using your fingertips to thoroughly mix; set aside. Line a baking sheet with a Silpat (French nonstick baking mat) or parchment paper; set aside.
  2. Lightly dust work surface with flour. Place two sheets (one box) of puff pastry on the work surface one on top of the other. Using a rolling pin, adhere the two pieces of the puff pastry together. Continue rolling puff pastry until it is very thin, slightly less than 1/8 inch thick. Using a pastry wheel or a sharp knife, cut the puff pastry into a 13-inch round, reserving scraps for decorating.
  3. Place the Brie in the center of the puff pastry. Top the Brie with pecan mixture, spreading to within 1/2 inch of the edge of the cheese. Be sure to remove any sugar or nuts from the puff pastry, as they may cause holes to form during baking. Fold puff pastry up and over Brie to enclose. The center of the Brie will not be completely covered with pastry. Transfer to prepared baking sheet.
  4. Lightly dust work surface with flour. Repeat rolling and cutting process with remaining two sheets of puff pastry. Drape pastry over the Brie, tucking the edges under to enclose.
  5. In a small bowl, combine egg yolk and cream to make an egg wash. Cut reserved scraps of puff pastry into decorative shapes. Using a pastry brush, gently brush the decorative shapes with the egg wash, and adhere to wrapped Brie. Brush the wrapped Brie evenly with the egg wash. Transfer to refrigerator and chill for at least 30 minutes and up to overnight.
  6. Preheat oven to 400 degrees. Bake Brie until golden brown and puffed, about 30 minutes. Reduce oven temperature to 350 degrees and bake until dark golden brown, 25 to 35 minutes more.

Next was Colin & Heather's
Wow she really went all out.
Look at this drink station, yes those glasses are rimmed with sugar and limes!
What a gorgeous table setting!
I forgot to take a pic of the food but it was superb, she had chicken recipe from Kona grill with some amazing sauces and mashed potatoes. I am definitely going to be getting this recipe so stay tuned.

Last but not least my house for Dessert. I made Hot Chocolate Truffle balls from Mels Kitchen.
As soon as I saw these I knew I would be making them, they are super simple and a cute way to have hot chocolate.
(I think next time I am going to try milk choc. chips instead of semi-sweet. )
Red Velvet Cake from Costco
try this you will not be disappointed.
Hudson made cookies with his cousins and brought them to share at the party
Everyone got a treat to pick from

Peppermint Bark -from Costco
Trail Mix -from Costco
- these were better than the ones at the mall, and Jackson made them all by himself!

Thursday, December 9, 2010

Thanksgiving

Yes I do realize it is Almost Christmas! I am a little behind but since both of these dishes will still work great for the Holidays I thought I better share them.

We had a Great Thanksgiving Weekend. We started with our Cummard Thanksgiving Eve Lobster Fest, which is exactly as good as it sounds. Even the side dishes are as delectable as the Lobster. They kind of have to be since I have a few sisters-in-law who are not into the whole "Seafood" scene, sad I know. My son however is Pro Lobster all the way, he tries to order it everywhere we go.

I brought the hor d'oeurvres, a Hot Spinach and Artichoke dip, and Deviled Eggs. They were both fantastic, that dip didn't last very long especially with the delicious Five Seed Crackers from Costco ( the BEST!!!!). My mom gave me this recipe forever ago and every time I make it I get rave reviews. It is very rich, creamy and tasty, it is hard not to eat every last bite. I even had a spinach hater dipping in! Yes it is as fattening as it looks, sorry!


Hot Artichoke Heart Dip

Ingredients:

1-14 oz can of artichokes (marinated in water) chopped and drained
2 cups mayo
1 cup graded parmesan cheese
1 can green chilis diced
2 dashes of garlic powder
1/2 pkg chopped spinach drained

Mix and Bake at 325 degrees for 30 min. Serve warm with crackers.

Serving idea: Microwave on high in covered dish until bubbly, 3-5 min. Transfer to round bread bowl, hollowed out. With a quick trip to the oven until bread is warm and slightly crispy


Yes this is me getting 3rd's of this phenomenal salad ( which I must get the recipe for).
The next day we headed up to Tonto Basin for Thanksgiving part II.

I saw this recipe on Mels Kitchen Cafe and even though I am NOT a stuffing fan I knew I had to make it. First it had goat cheese in it, which I love ( and also had a ton of) plus the picture looked so good I just knew it had to be. My mom also decided I need to make it as well after hearing the title " Wild Rice and Goat Cheese Stuffing" Hello, how could that not be good.

I ended up baking mine on a cookie sheet so there was more surface area to crisp up and oh baby it was good! I mean I think my Grandma's may have gotten overlooked next to this beauty. There were a lot of fans and not one nay sayer. So if you are looking to impress this will make you look like Giada or Rachel!

Wild Rice and Creamy Goat Cheese Stuffing
from Mels Kitchen Cafe

*Note: if you don’t prefer the taste of goat cheese, simply substitute cream cheese, a milder tasting creamy cheese, or leave it out altogether.

*Serves 10-12 as a side dish and the recipe can be easily halved

2 cups wild rice (I used a blend of wild and brown rice)
8 ounces turkey bacon, chopped
4 tablespoons butter
1 cup diced yellow onion
1/2 cup diced carrots
1/2 cup diced celery
3 cloves garlic, finely chopped
2 teaspoons dried thyme
1 (day-old) loaf country-style or artisan bread, cubed, about 6 cups of bread cubes
12 ounces goat cheese or cream cheese
1/2 cup fresh flat-leaf parsley, chopped
1 teaspoon salt
1/2 teaspoon pepper
2 cups chicken broth or stock

Preheat the oven to 375 degrees F.

Cook wild rice according to package directions, making sure the rice cooks completely and is very tender and soft. Transfer the rice to a large bowl when it has finished cooking and has cooled for about 10 minutes.

Heat the butter in a large 12-inch nonstick skillet over medium heat. Add the bacon, onions, carrots and celery and cook until soft, stirring occasionally. Add the garlic and thyme and cook for 1 minute, stirring constantly. Add the onion mixture, bread cubes, goat cheese, parsley, salt, pepper and chicken broth to the large bowl with the rice. Mix to combine. I like my stuffing a bit on the non-soggy side so add more chicken broth 1/4 cup at a time if you’d like your mixture more wet.

Transfer the mixture to a large (9X13-inch or even larger) lightly greased baking dish and bake, uncovered, until heated through and golden brown, about 30 minutes. Remove from the oven and let rest 10 minutes before serving.


Guess I caught these 2 a little off guard
Jackson on his 2nd helping of pie. This boy is such a good eater, there isn't anything he won't eat!
and what would a good Thanksgiving in the desert be without some clay pigeon shooting

man look at that form
yeah I didn't hit any :(
and of course my greatest Blessings

Thursday, August 26, 2010

Homemade Pretzels!

Making homemade pretzels has always been something I wanted to try, so when I came upon this super easy recipe I decided it was about time. Jackson was equally excited about the task.

After the dough is made you will separate into 8 golf ball sized balls .
just make sure you don't let the dough separate from each other after they are in balls, they DO Not come back together.
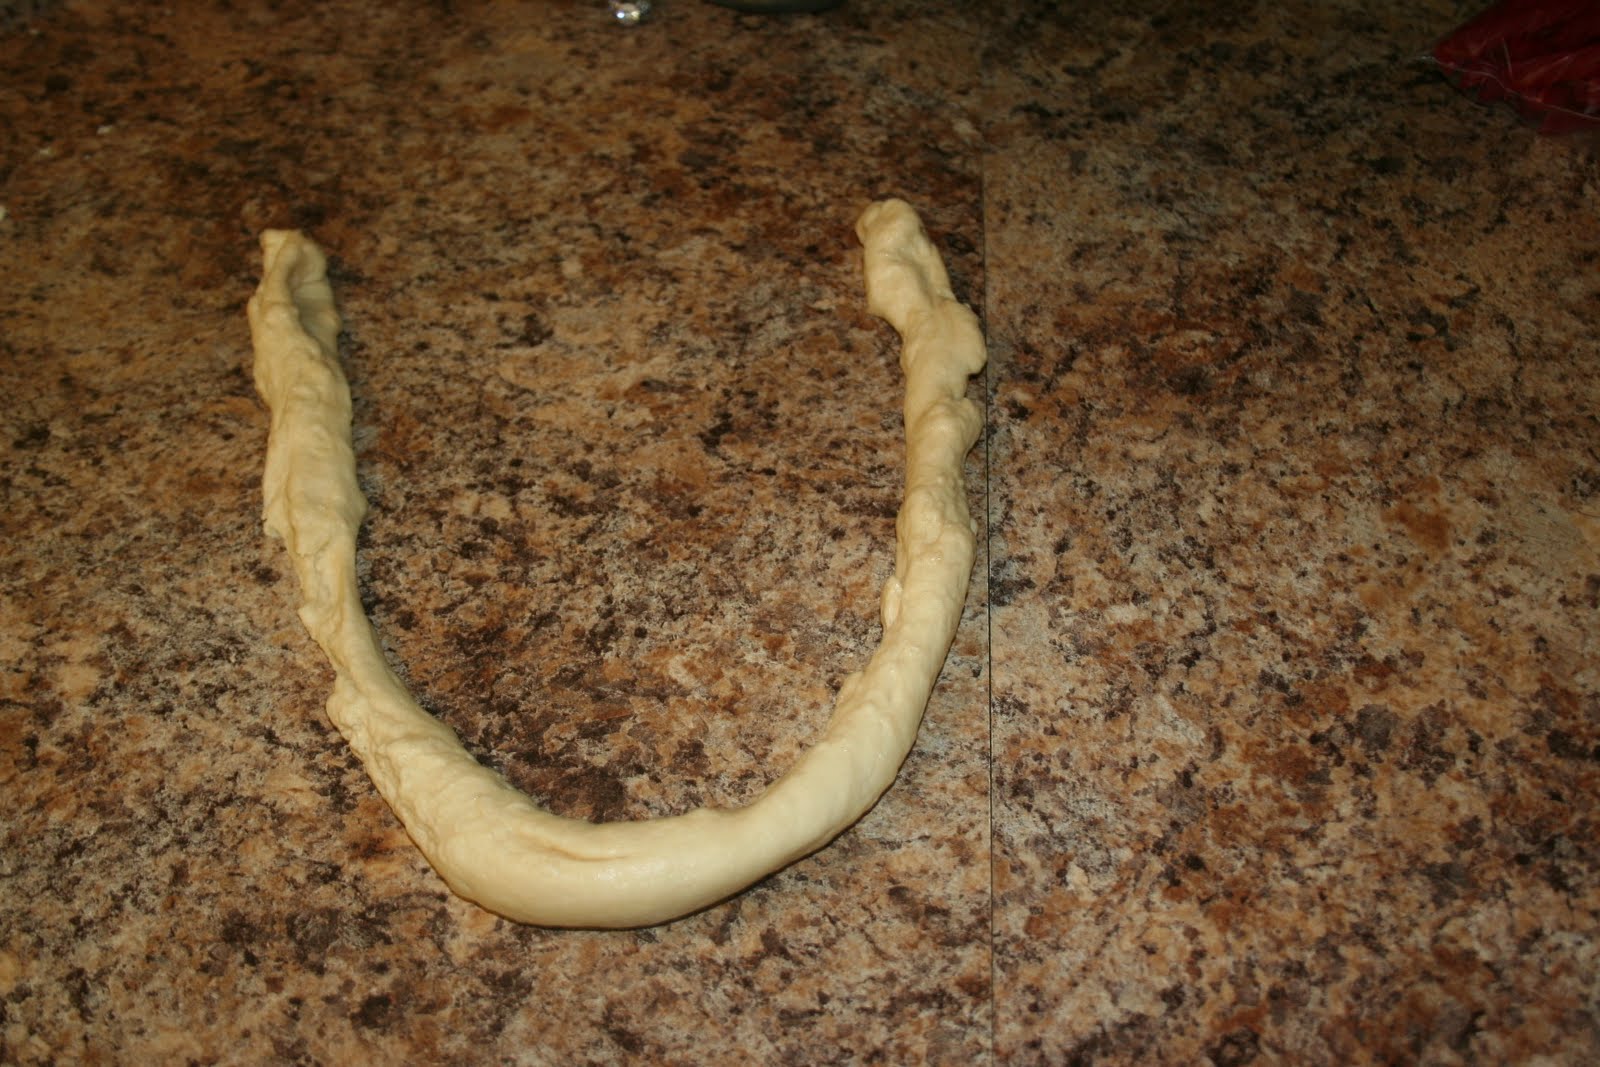
Roll as long of a snake as you can- trust me the longer the better.
Right after that start shaping because the line will start shrinking
after the U twist the sides and push them down in a pretzel shape
then boil for 30 seconds


Some of mine look a little deformed- you will definitely get the hang of it the more you do.
They were really good but I gotta say they tasted a lot like the kind from the freezer.
The don't last very long either so eat em up quick.
I may still look around for another recipe one that really blows my socks off. So if anyone out there has one let me know.

Homemade Soft Pretzels- Alton Brown


Ingredients

  • 1 1/2 cups warm (110 to 115 degrees F) water
  • 1 tablespoon sugar
  • 2 teaspoons kosher salt
  • 1 package active dry yeast
  • 22 ounces all-purpose flour, approximately 4 1/2 cups
  • 2 ounces unsalted butter, melted
  • Vegetable oil, for pan
  • 10 cups water
  • 2/3 cup baking soda
  • 1 large egg yolk beaten with 1 tablespoon water
  • Pretzel salt

Directions

Combine the water, sugar and kosher salt in the bowl of a stand mixer and sprinkle the yeast on top. Allow to sit for 5 minutes or until the mixture begins to foam. Add the flour and butter and, using the dough hook attachment, mix on low speed until well combined. Change to medium speed and knead until the dough is smooth and pulls away from the side of the bowl, approximately 4 to 5 minutes. Remove the dough from the bowl, clean the bowl and then oil it well with vegetable oil. Return the dough to the bowl, cover with plastic wrap and sit in a warm place for approximately 50 to 55 minutes or until the dough has doubled in size.

Preheat the oven to 450 degrees F. Line 2 half-sheet pans with parchment paper and lightly brush with the vegetable oil. Set aside.

Bring the 10 cups of water and the baking soda to a rolling boil in an 8-quart saucepan or roasting pan.

In the meantime, turn the dough out onto a slightly oiled work surface and divide into 8 equal pieces. Roll out each piece of dough into a 24-inch rope. Make a U-shape with the rope, holding the ends of the rope, cross them over each other and press onto the bottom of the U in order to form the shape of a pretzel. Place onto the parchment-lined half sheet pan.

Place the pretzels into the boiling water, 1 by 1, for 30 seconds. Remove them from the water using a large flat spatula. Return to the half sheet pan, brush the top of each pretzel with the beaten egg yolk and water mixture and sprinkle with the pretzel salt. Bake until dark golden brown in color, approximately 12 to 14 minutes. Transfer to a cooling rack for at least 5 minutes before serving.

Related Posts Plugin for WordPress, Blogger...