Showing posts with label dessert. Show all posts

Wednesday, November 2, 2011

Homemade Butterfingers

I have always loved Butterfingers, but lets face it there are a couple of problems with them. First they get stuck in your teeth and never come out and Second they make a huge mess! Well what if I told you I could solve those problems and still give you the flavor you love. Interested?? If you aren't than you are not a Butterfinger fan and therefore do not need to read the rest of this post.

I found this gem on Pinterest (where else!) and knew it would be perfect for the "Pinterest" party my SIL was having, where we were all supposed to bring our favorite Holiday treat that we saw on Pinterest. Fabulous Idea right?! I saw these 3 ingredient Butterfingers and knew that they were going to be a crowd pleaser. Was I right, um Heck Yeah I was!!! I think every single person asked how to make them.


So here it is

1 lb. of Candy Corn ( yeah crazy huh)
1 160z jar of creamy peanut butter
1 package Chocolate Almond Bark

Melt the candy corn in a microwave bowl stirring at 30 second intervals. You could also use a double boiler. Once melted add the peanut butter. The candy corn will most likely seize up so you will probably need to microwave for another minute. Stir it together and once it incorporates place it into a 8x8 dish lined with tin foil ( you could also us a 9x13 if you want your bars thinner.) let them chill in fridge till set and cold. Then cut them and dip in melted chocolate. It's messy and hard to get pretty but it don't matter!


Monday, July 18, 2011

Chocolate Ganache & Presley's Party

I love the party site Karas Party Ideas. It has every party idea imaginable. For Presley's last birthday I got the idea of a Cookies & Milk party from there, so when I was trying to decide on a theme I went through the site and found the perfect party idea.

An Ice Cream Party! It had ideas for the cake, party favors, invitations & hats. I of course copied it all, and while it turned out so super cute I will not be showing you the other pics for fear it would make mine look less Awesome!


I realized that to make this cake I would have to learn how to make Chocolate Ganache. I was a little nervous but also excited since I had always wanted to learn.
I am so glad I tried it since it was the Easiest thing ever!
There are literally 2 ingredients.

Chopped bittersweet chocolate
Heavy cream that is boiling hot
whip
whip some more till smooth
cool slightly and then pour on

let it run off or help it along in the fashion you want
The remaining that I didn't use I waited until it was cooled and hard, stirring along the way, then I scooped with an ice cream scoop and plopped it on the cake to look like ice cream.
Easy Peasy!


The party turned out Gorgeous and Presley had a blast!


Chocolate Ganache
adapted from all recipes

Ingredients

  • 9 ounces bittersweet chocolate, chopped
  • 1 cup heavy cream

Directions

  1. Place the chocolate into a medium bowl. Heat the cream in a small sauce pan over medium heat. Bring just to a boil, watching very carefully because if it boils for a few seconds, it will boil out of the pot. When the cream has come to a boil, pour over the chopped chocolate, and whisk until smooth. Stir in the rum if desired.
  2. Allow the ganache to cool slightly before pouring over a cake. Start at the center of the cake and work outward. For a fluffy frosting or chocolate filling, allow it to cool until thick, then whip with a whisk until light and fluffy.

Tuesday, May 24, 2011

Red Velvet Whoopie Pies

For my sister's wedding my mom made the best Whoopie Pie's. Now if you have never had one, I would say it's a little like a homemade oreo, but much lighter and frankly in my opinion better! Everyone loved them and of course were the first things to go. I wanted to make some the other day and found this delicious recipe on The Girl Who Ate Everything for Red Velvet Whoopie's. Sounded like a dream, so I decided to give them a whirl. They were extremely easy and turned out beautiful. All which doesn't mean anything if they don't taste good right? Well they did, they tasted Better than good they were Fantastico!

( I used the whoopie pie filling and Loved it, plus it is easier)


Red Velvet Whoopie Pies
by Better Homes and Gardens

2 cups all-purpose flour
2 Tbsp. unsweetened cocoa powder
1/2 tsp. baking soda
1/4 tsp. salt
1/2 cup butter, softened
1 cup packed brown sugar
1 egg
1 tsp. vanilla
1/2 cup buttermilk
1 1-oz. bottle red food coloring (2 Tbsp.)

Whoopie Pie Filling
1/4 cup softened butter
4 ounces cream cheese, softened
7 ounce jar Marshmallow creme

OR

Cream Cheese Frosting
4 ounces cream cheese, softened
4 tablespoons (½ stick) butter, softened
2 cups (8 ounces) powdered sugar
½ teaspoon vanilla
splash of milk if needed

1. Preheat oven to 375 degrees F. Line baking sheets with parchment; set aside. In medium bowl combine flour, cocoa powder, baking soda, and salt; set aside.

2. In large mixing bowl beat butter on medium to high 30 seconds. Beat in brown sugar until light and fluffy. Beat in egg and vanilla. Alternately add flour mixture and buttermilk, beating after each addition just until combined. Stir in food coloring.

3. Spoon batter in 1- or 2-inch diameter rounds, about 1/2-inch high on prepared baking sheets, allowing 1 inch between each round. ( the best thing to use is a small cookie scoop)

4. Bake 7 to 9 minutes for 1-inch cookies or 9 to 11 minutes for 2-inch cookies, or until tops are set. Cool completely on baking sheets on rack. Remove cooled cookies from baking sheets.

5. To fill, dollop Whoopie Pie Filling or Cream cheese frosting on flat sides of half the cookies. Top with remaining cookies, flat sides down. Makes 60 one-inch or 42 two-inch cookies.

6. To store: Refrigerate in airtight container up to 4 days. Let stand at room temperature 15 minutes before serving.

Monday, May 23, 2011

Microwave Monkey Bread

Now everyone I know has had some version of Monkey Bread. You can even get a mix at Williams Sonoma. But my family definitely grew up on the Ghetto Version. My mom got this recipe from Homemaking night and we have been using it ever since. It would almost always make an appearance at Family Home Evening. The thing we love the best about it is that it takes literally no preparation or forethought and about 5 min. to make, all in the Microwave. But if it isn't darn good! Everybody loves it and the kids can even make it themselves. So if you need a fast dessert this puppy is definitely your man!


Microwave Monkey Bread

1/3 cup dark brown sugar
1 T. water
3 T. butter
1 pkg of refrigerator biscuits ( the small biscuits)
1/2 cup chopped nuts (optional)

Mix sugar , water and butter in a large pyrex bowl. Cook in microwave for 2 min. Add biscuits & nuts & insert small juice glass in the center of the bowl. Cook 2 min. and let stand 2 min. Remove glass and invert on a plate. .

Friday, April 22, 2011

Easter Love

In one more day I will be leaving for Europe! I know I am so excited. My mom and best friend Ang and I will be going to Paris, Marseille & Barcelona. My brother and sister in law live in France and we will get to see them as well. I am so excited to try all the Foods, experience the Culture, visit the awe-inspiring sights and just BE on Vacation in the most Awesome places ever! I will definitely be blogging about the trip and all the foods I get to experience, I may even get some tips from the Chefs! France is however where Julia got her start.

The only sad part of my trip is that I will be missing Easter with my family.

My sister in law Heather brought this by today, how freaking cute is that. She grew her own grass in these plastic baskets, then made them cute with fabric. How cool is that. Plus it has Trader Joes Peanut Butter Eggs -which are the Best things ever! Thanks Hezz

My mom had a dinner last night in place of our family Easter dinner. I had been wanting to make a couple of things so I told her I would bring the veggies and dessert.

A couple of weeks past for our Relief Society Enrichment night they served this amazing veggie casserole- it was to die for. My sister and I had like 3 helpings.
So here it is ( this will be a perfect dish for the summer gardens) It is filled with squash and carrots and has Amazing flavor. Everyone loved it, even the kids.
(onions not pictured)

ZUCCHINI – CARROT CASSEROLE

4 medium zucchini, sliced 1/2"thick 3 cups or 1 box Pepperidge Farm

5 large carrots, pared and sliced Classic Cut Seasoned Croutons

1 1/2 cups chopped onion (2 med.) (small croutons)

1 (10 3/4 oz) can cream of chicken soup 1/2 cup sour cream

1 cube margarine

Preheat oven to 375°F. Steam or boil zucchini and carrots just until tender. In a

large saucepan, sauté onion in 4 Tbsp of margarine until the onions are tender. Stir

in 1 1/2 cups croutons, soup and sour cream. Gently stir in zucchini and carrots.

Lightly butter a 9 x 13-inch pan or casserole dish. Put mixture into pan. Melt

remaining margarine in a small saucepan. Add remaining croutons. Toss gently

and sprinkle over the casserole mixture. Bake for about 15 minutes or until mixture

is bubbly around the edges and the croutons are toasted. Makes 10 servings


This beauty I found on Mels Kitchen cafe, as soon as I saw it I was looking for an opportunity to make it.

Now it has 3 sticks of butter and like 3 cups of brown sugar, so the chances of it Not being good are Zero! We all loved it and I will definitely be making it again.

( I used gala apples since I already had a ton and it tasted great so use what you got)


Caramel Apple Cheesecake Bars with Streusel Topping- Mels Kitchen Cafe
Printable Version
Printable Version with Picture

Base:
2 cups all-purpose flour
1/2 cup firmly packed brown sugar
¼ teaspoon salt
½ teaspoon cinnamon
1 cup (2 sticks) butter, softened

Cream Cheese Layer:
2 (8-ounce) packages cream cheese, softened
1/2 cup sugar
2 large eggs
1 teaspoon vanilla extract

Apples:
3 Granny Smith apples, peeled, cored and finely chopped
2 tablespoons sugar
1/2 teaspoon ground cinnamon
1/4 teaspoon ground nutmeg

Streusel Topping:
1 cup firmly packed light brown sugar
1 cup all-purpose flour
½ teaspoon cinnamon
1/2 cup quick cooking oats
1/2 cup (1 stick) butter, softened

1 cup caramel sauce (homemade recipe below)

Preheat oven to 350 degrees F.

In a small bowl, stir together chopped apples, two tablespoons sugar, cinnamon, and nutmeg. Set aside.

In a medium bowl, combine all the streusel topping ingredients and mix until crumbly. Set aside.

In a medium bowl, combine flour and brown sugar. Cut in butter with a pastry blender or two forks until mixture is crumbly but combined. Press evenly into a 9X13-inch baking pan lined with aluminum foil. Bake for 10 minutes or until lightly browned.

While the crust is baking, in a large bowl, beat cream cheese with 1/2 cup sugar until smooth. Then add eggs, one at a time and then the vanilla. Mix well. Pour over the warm crust.

Spoon the apple mixture evenly over the cheesecake layer. Sprinkle the streusel topping over the apples. Bake for 30 minutes until the filling is set.

Cool the bars to room temperature. Drizzle with the caramel topping (or plate individual slices and drizzle with topping one by one).

Caramel Sauce:
4 tablespoons butter
1 cup firmly packed light brown sugar
½ cups half-and-half or cream
Pinch of salt
1 tablespoon vanilla

Mix butter, brown sugar, half-and-half or cream, and salt in a saucepan over medium-low heat. Bring the mixture to a simmer and cook while whisking gently for 5 to 7 minutes, until thickened slightly. Add the vanilla and cook another minute to thicken further. Turn off the heat and pour the sauce into a jar. Refrigerate until cold. If the caramel sauce has cooled in the fridge long enough to harden, warm slightly before drizzling on bars.

Recipe Source: Bars adapted from my brother, Nate (I think he originally found them on the Food Network), caramel sauce from Pioneer Woman

Monday, January 24, 2011

Indoor Camping Fun!

For the last day and a half I have had The Worst Toothache EVER. :( With no real relief besides sleep I have barely made it through each day. But in another hour I have an appt. to have it looked at so good luck to me. But even with all of that I have made a New Years goal to be a better blogger, one post each weekday. So I am here and have one of my all time favorite meals to share with you. Since the first time I was introduced to Tin Foil dinners at a young girls activity, I knew I would forever be making them. Plus the fact that my favorite dessert is a perfect compliment to this meal.

This being said I am not now nor have I ever been a "camping" kinda girl. I am barely able to handle a fully equipped cabin. So I have had to make do with my modern day appliances. Is this meal any less fantastic when it is not made over coals and flames? Absolutely NOT! So if you love this meal as well but have never tried making it inside, I am now giving you permission. So fire up the oven and get cooking.

Tell me your mouth isn't watering at the sight of that ooey gooey mess.


Tin Foil Dinner/HOBOJOE"S

1lb ground beef
sliced carrots
bag of frozen corn
sliced yellow onion
diced potatoes
can cream of mushroom soup
head of cabbage


I first like to start off by boiling my carrots and potatoes for about 5 min. to soften them up a bit, ( this cuts down on the cooking time). Set out your tin foil (double layer) and start loading it up- a couple of leafs of cabbage, a patty of ground beef, a few carrots, potatoes, some corn, onions, a heaping spoonful of soup and some salt a pepper. Then make the next one. I usually set up an assembly line ( much faster). Then fold it up, I add another piece of tin foil, making sure it is sealed very well. Then put it in the oven at 350 for about 40-50 min. checking to see when meat and veggies are done. I like to serve with ketchup.

The Perfect Indoor Smore

Preheat oven to broil

place 1/2 of a graham cracker down, place 1/4 of the chocolate bar on each graham cracker and a marshmallow on top. Place in oven for about 30 sec. to a min. As soon a marshmallow starts getting bigger take out. Place another 1/2 of graham cracker on top and there you have it. Perfection.

Friday, January 21, 2011

Yogurt Cream with Fruit

I am not a huge fruit person, so when I am assigned to bring fruit somewhere I am always fretting about what to make. I usually try something new, hoping to find something that really makes me Love fruit. When I saw this on Becoming Betty who saw it on Pioneer Woman, I knew I would LOVE it! It sounded very elegant and fancy, which I try and pretend to be. At the same time it was super simple.

and..........................it was GREAT!!!!!!! I love it so silky smooth and the perfect amount of sweetness. Definitely one of the best ways to do fruit. The Pioneer woman put hers in martini glasses and made it even more Fancy! I will be trying that next time for sure.
after it has sat in the fridge this is what it looks like,pretty weird huh.


Yogurt Cream with Berries
1 1/2 cups plain, unflavored yogurt
1 1/4 cups heavy whipping cream
3/4 cup brown sugar
*Put yogurt in a mixing bowl. Add whipping cream and whisk together really well. Sprinkle brown sugar over the top and DO NOT stir. Cover with plastic wrap and put in refrigerator for several hours. After several hours, remove wrap and stir well. Spoon over fresh berries or any fruit for a really yummy treat.

Thursday, December 23, 2010

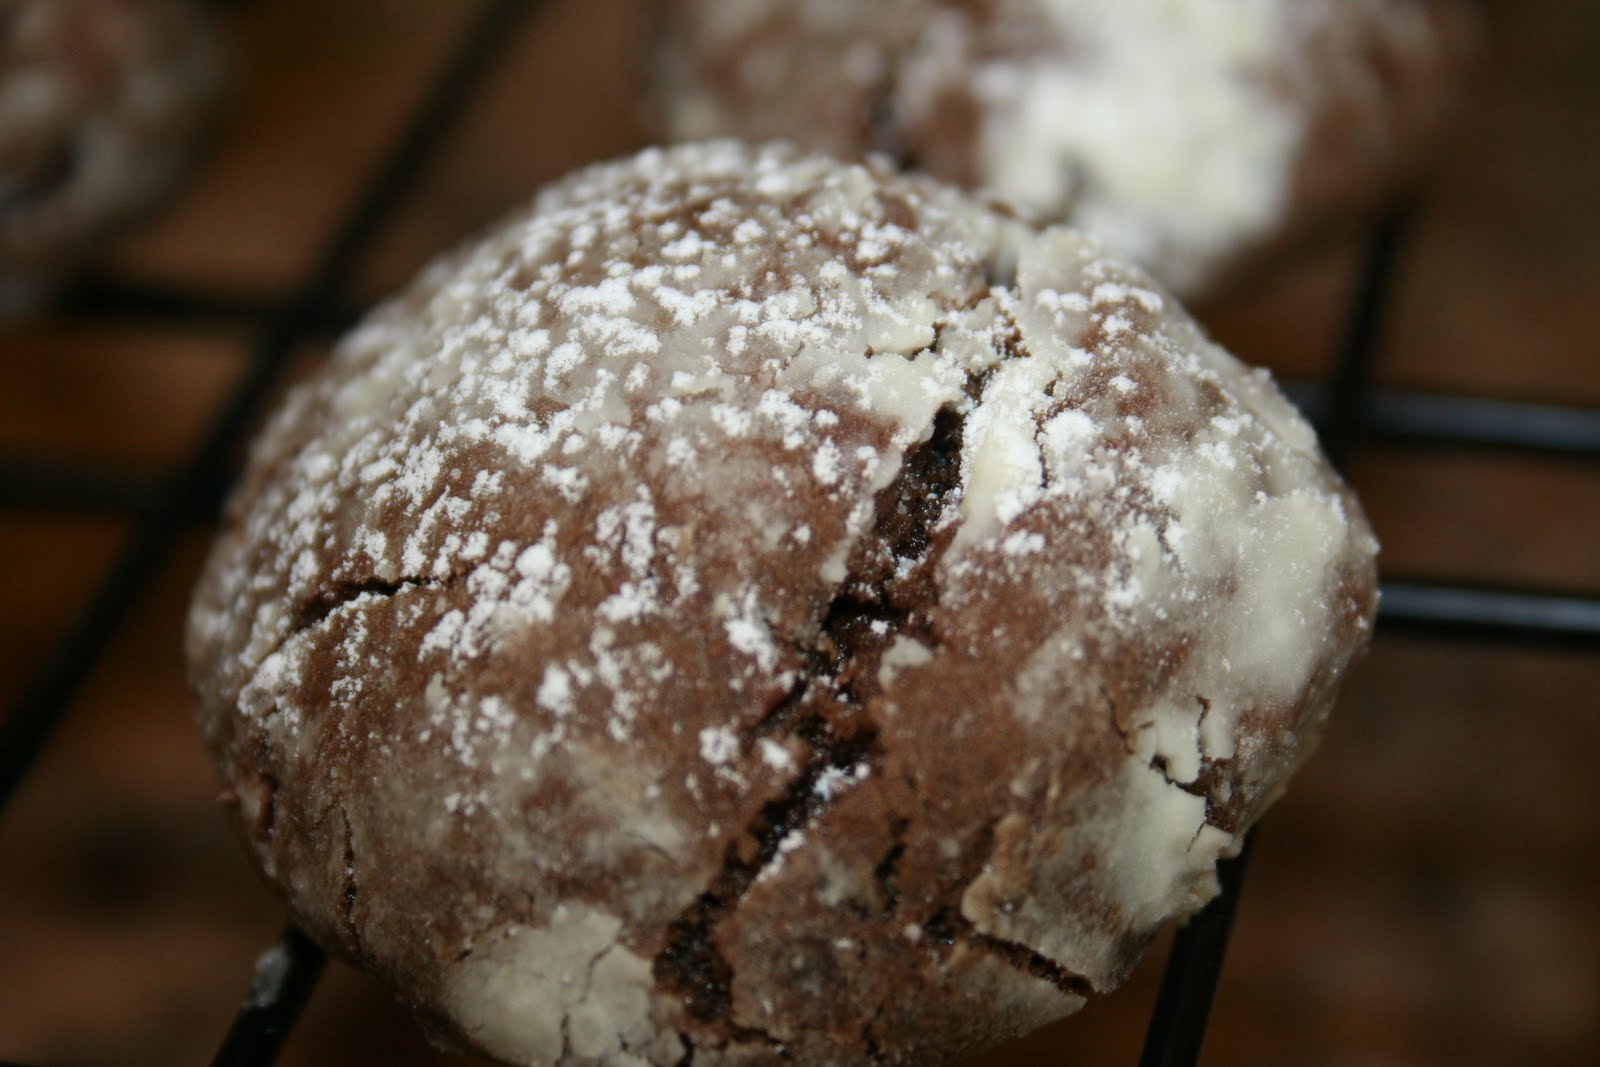
Crinkle Cookies for Santa

I saw these cookies a few years ago in a magazine, we tried them and loved them. This year after I made them my husband informed me that these were one of his 2 Favorite cookies, and proceeded to eat as much as I would allow. Since I made these to give out to neighbors I kinda had to hide them from him. But in his defense they are REALLY REALLY GOOD!
So while we already made these a couple of times and ate most of them, we have decided to make them for Santa as well because doesn't he deserve the BEST, and they are the BEST!

I hope everyone is having a wonderful Christmas season and I will report back after Christmas with all the goodies I have eaten and made, here are a couple that you may find some use for.


Chocolate Crinkles


Ingredients:
3/4 cup butter, melted
1/2 cup unsweetened cocoa powder
1 cup sugar
2 eggs
2 teaspoons vanilla extract
2 cups flour
1 teaspoon baking powder
1 teaspoon baking soda
1/2 teaspoon salt
6 ounces mini semisweet chocolate chips
1/4 cup powdered sugar

In a large bowl mixt together he melted butter, cocoa powder, and sugar. Wisk in the eggs and vanilla extract. In a medium size bowl, stir together the four, baking powder, baking soda and salt. Use a large spoon to slowly add he dry ingredients to the chocolate mixture. Stir in the chips . Refrigerate dough 2 hours.

Heat the oven to 350 degrees. Form the dough into 1-inch balls, then roll them in confectioners sugar. Bake the cookies on an un-greased cookie sheet for 10 min. Set the sheet on a wire rack for 5 min. then lightly dust the cookies with powdered sugar. Transfer cookies to rack to cool completely. Makes 4 dozen.

Once again these are so good and taste like little truffle cookies, so moist and rich and oh just perfect. Also here is a cute way to give them to a friend.
Put some cute paper on an empty pringles can.


For Steve's Birthday this year I did a Cereal bar party, I also made a couple of breakfast casseroles. This one from Pioneer Woman was INCREDIBLE. It was totally different and so good everyone loved it and it was the first one gone. The secret is the Pita Chips, if you have ever had these you know they rock, if not you are missing out.

This is what I will be making for Christmas Morning, I am already excited for it!


Here is the recipe I used, next time I make it though I will be adding at least 4-6 more eggs. It did not have enough. Just fyi

Recipe: Mushroom Bacon Breakfast Strata

| | |


  • 10 slices Bacon, Cut Into 1/2" Pieces
  • 12 whole White Mushrooms, Sliced
  • 8 whole Eggs Beaten
  • ½ cups Half-and-half
  • Salt And Pepper, to taste
  • 4 ounces, weight Cream Cheese
  • ½ cups Grated Cheddar Cheese
  • 10 ounces, weight Stacy's Simply Naked Pita Chips

Preparation Instructions

Fry bacon pieces in a large skillet until done but not overly crispy. Drain on a paper towel, pour grease from skillet. Add mushrooms to skillet (don’t clean skillet first) and cook until done.

Mix eggs, half-and-half, salt, and pepper.

Arrange pita chips in an 8 x 11-inch baking dish. Slightly press to flatten. Tear pieces of cream cheese and evenly distribute over the top of chips. Distribute mushrooms and bacon over the top of this, followed by the cheddar cheese. Pour egg mixture evenly over all ingredients.

Place into the fridge for several hours of overnight (makes a handy breakfast casserole!), then bake at 325 degrees for 20 minutes or until eggs are set. Cut into squares and serve immediately. Enjoy!


Tuesday, December 14, 2010

Progressive Dinner

We have been doing Progressive Dinner with the Cummards for awhile now. This was my family's first year to do it. It is such a fun way to see everyones Christmas Decor while enjoying AMAZING food! My family sure knows how to bring it.

The first house was appetizers with Hayley & Brett the newlyweds!
She made spinach and artichoke dip & , jalapeno jelly with cream cheese.
Brett decided to get fancy and made this super Delicious Brie En Croute, I have been seeing this everywhere but didn't really think I liked Brie, well I was wrong this puppy was to die for. The puff pastry was stuffed with brie, pecans and brown sugar - Hello this was almost dessert and dang good. Also could it look any fancier. If you are looking to impress this is the way to go.

Ingredients

(adapted from Martha Stewart0

Serves 12 to 16

  • 1/2 cup pecan halves
  • 1/2 cup packed dark-brown sugar
  • All-purpose flour, for dusting
  • 2 standard packages (17 1/4 ounces) frozen puff pastry, thawed
  • 1 wheel (2.2 pounds) Brie
  • 1 large egg yolk
  • 2 tablespoons heavy cream

Directions

  1. In a medium bowl, combine pecans and sugar, using your fingertips to thoroughly mix; set aside. Line a baking sheet with a Silpat (French nonstick baking mat) or parchment paper; set aside.
  2. Lightly dust work surface with flour. Place two sheets (one box) of puff pastry on the work surface one on top of the other. Using a rolling pin, adhere the two pieces of the puff pastry together. Continue rolling puff pastry until it is very thin, slightly less than 1/8 inch thick. Using a pastry wheel or a sharp knife, cut the puff pastry into a 13-inch round, reserving scraps for decorating.
  3. Place the Brie in the center of the puff pastry. Top the Brie with pecan mixture, spreading to within 1/2 inch of the edge of the cheese. Be sure to remove any sugar or nuts from the puff pastry, as they may cause holes to form during baking. Fold puff pastry up and over Brie to enclose. The center of the Brie will not be completely covered with pastry. Transfer to prepared baking sheet.
  4. Lightly dust work surface with flour. Repeat rolling and cutting process with remaining two sheets of puff pastry. Drape pastry over the Brie, tucking the edges under to enclose.
  5. In a small bowl, combine egg yolk and cream to make an egg wash. Cut reserved scraps of puff pastry into decorative shapes. Using a pastry brush, gently brush the decorative shapes with the egg wash, and adhere to wrapped Brie. Brush the wrapped Brie evenly with the egg wash. Transfer to refrigerator and chill for at least 30 minutes and up to overnight.
  6. Preheat oven to 400 degrees. Bake Brie until golden brown and puffed, about 30 minutes. Reduce oven temperature to 350 degrees and bake until dark golden brown, 25 to 35 minutes more.

Next was Colin & Heather's
Wow she really went all out.
Look at this drink station, yes those glasses are rimmed with sugar and limes!
What a gorgeous table setting!
I forgot to take a pic of the food but it was superb, she had chicken recipe from Kona grill with some amazing sauces and mashed potatoes. I am definitely going to be getting this recipe so stay tuned.

Last but not least my house for Dessert. I made Hot Chocolate Truffle balls from Mels Kitchen.
As soon as I saw these I knew I would be making them, they are super simple and a cute way to have hot chocolate.
(I think next time I am going to try milk choc. chips instead of semi-sweet. )
Red Velvet Cake from Costco
try this you will not be disappointed.
Hudson made cookies with his cousins and brought them to share at the party
Everyone got a treat to pick from

Peppermint Bark -from Costco
Trail Mix -from Costco
- these were better than the ones at the mall, and Jackson made them all by himself!
Related Posts Plugin for WordPress, Blogger...