Showing posts with label ground beef. Show all posts

Monday, January 30, 2012

Pastitsio a Greek Lasagna


I am sorry for my lack of posting for the last few months. Ever since I got pregnant my love of food turned into more of a disdain. I didn't want to eat anything or make anything. Luckily my husband came to the rescue and got my family through the time with some of his favorite meals and a lot of take-0ut!

I am now back and cooking again, but more importantly my love of food is Back and more than that I think it has doubled!

Last summer my family took a trip back east to visit family, while there my dad's best friends mom Mrs. Karidis, who is the best Greek cook I know, made us some tasty stuff. Which left me with a craving for the Greek! Something new I tried was Pastitsio- a Greek Lasagna. It was so creamy and rich and comforting it even was good cold. So when I was watching a Triple D episode that was featuring that particular dish I decided that was my sign to give it a try. I looked online and found a few recipes that I combined a little to fit my tastes and had at it.

I invited my dad over for the taste test since he grew up eating the stuff, and he LOVED it said it tasted just like Mrs. Karidis's! The family and I loved it as well, It made so much that I think I had it for leftovers like 5 times.

* one of the hardest parts of this recipe was finding a pan that fit it because it stacks really high. I used one of the throw away lasagna pans.

Pastitsio

Ingredients

1/2 pound butter, plus 4 ounces melted
  • 2 pounds ground meat
  • 1 onion, chopped fine
  • Salt and pepper
  • 1 (12-ounces) can tomatoes
  • 1 (12 ounce) can tomato sauce
  • 1 bay leaf
  • 2 teaspoons cinnamon
  • 1 pound ziti rigate or penne
  • 3 cups grated parmesan cheese
  • 3/4 cup flour
  • 3 1/2 cups whole milk
  • 5 eggs

Directions

In a hot pan melt 4 ounces of butter, add ground chuck, chopped onion, salt, and pepper. Add tomatoes and tomato sauce, bay leaf, and cinnamon and cook over medium flame for about 35 minutes.

Cook macaroni in boiling water, strain and put back in pot to keep warm.

Place a 1/4 of the grated cheese in n a 11 by 14-inch pan with very high sides ( I used a lasagna pan) , and then a layer with 1/3 of the pasta. Continue until both ingredients are used up. Spread on the meat sauce.

Mix the final layer, the Pastitsio Crema by mixing 4 ounces of melted, cooled butter and 3/4 cup of flour. Heat 3 1/2 cups of milk and pour a little over flour and butter mixture then pour the rest of the mixture into the milk. Add 5 beaten eggs and stir thoroughly over medium flame until mixture thickens. Pour the crema on top of the meat sauce and bake in a preheated 350 degree oven for 1 hour or until brown. Cool for 1 hour before cutting.

Tuesday, June 14, 2011

Meatballs and Creamy Marinara

I love homemade meatballs. We were always having them in one form or the other as a kid. When I make spaghetti and meatballs I usually make the meatballs and used canned sauce. All of which is good. But this time to make it a little more homemade and bring it up a notch, I added Panko (Japanese bread crumbs) to the meatballs and Heavy Cream to the canned sauce. It definitely made a difference. The family loved it, but who wouldn't it's got Cream in it!


Meatballs

1 1/2 lb of ground beef ( or a mixture of beef and sausage)
2 eggs
1/2 cup parmesan cheese
1/2 cup Panko
1 T Italian seasoning
salt and pepper
your favorite jar of spaghetti sauce

Mix together with your hands. Then roll into balls ( however big or small you want)

Pour some olive oil into a pan and brown them in a single layer. Making sure not to turn them over till they are completely brown or they will tear. When they have been browned on both sides. Pour sauce into the pan and let them simmer together till cooked through (about 15-20 min) . To add some extra flavor pour about 1/2 cup of cream into the sauce, and some fresh basil strips.


Thursday, March 24, 2011

Cowboy Dinner


When I saw this meal on Mel's Kitchen Cafe I knew it was right up my alley! Basically I will try cornbread with anything. It is truly in my top 5 of things to eat. Best thing about this meal is that I had Everything on hand, that doesn't happen very often but when the ingredients and versatile and easy to store in the freezer or pantry it makes for one easy dinner. So if this mixture of beans, corn, beef, cheese and cornbread sound as good to you as it did to me then you should definitely make this.

Cowboy Dinner

*Serves 6-8

Beef Mixture:
2 pounds lean ground beef
1 medium yellow onion, diced
1 teaspoon salt
1/2 teaspoon black pepper
1 cup frozen corn kernels
1 1/2 cups salsa (jarred or homemade)
1 can (15 ounce) black, pinto or white beans, rinsed and drained
1 cup shredded cheddar cheese

Cornbread Topping:
½ cup cornmeal
1 ½ cup flour
1/3 cup sugar
1 tablespoon baking powder
½ teaspoon salt
1/3 cup oil
2 eggs, beaten
1 ¼ cup milk

Preheat the oven to 375. Lightly grease a 9X13-inch pan and set aside.

In a large 12-inch skillet, brown the ground beef and onion, adding the salt and pepper, over medium-high heat until the beef is no longer pink. Drain the grease from the pan. Stir in the corn, salsa, and beans. Pour the beef mixture into the prepared 9X13-inch baking pan and set aside.

For the cornbread, combine the cornmeal, flour, sugar, baking powder and salt in a medium bowl. Make a well in the center and add the oil, beaten eggs and milk. Whisk together until just moistened and no dry spots remain.

Sprinkle the cheese over the beef mixture and pour the cornbread batter over the cheese and beef mixture. Gently spread the cornbread to the edges of the pan, evening it out over the top of the casserole.

Bake for 40-45 minutes until the edges are bubbly and a toothpick inserted into the center of the cornbread comes out clean or with a few moist crumbs. Let the casserole stand for 10 minutes before serving.


Monday, January 24, 2011

Indoor Camping Fun!

For the last day and a half I have had The Worst Toothache EVER. :( With no real relief besides sleep I have barely made it through each day. But in another hour I have an appt. to have it looked at so good luck to me. But even with all of that I have made a New Years goal to be a better blogger, one post each weekday. So I am here and have one of my all time favorite meals to share with you. Since the first time I was introduced to Tin Foil dinners at a young girls activity, I knew I would forever be making them. Plus the fact that my favorite dessert is a perfect compliment to this meal.

This being said I am not now nor have I ever been a "camping" kinda girl. I am barely able to handle a fully equipped cabin. So I have had to make do with my modern day appliances. Is this meal any less fantastic when it is not made over coals and flames? Absolutely NOT! So if you love this meal as well but have never tried making it inside, I am now giving you permission. So fire up the oven and get cooking.

Tell me your mouth isn't watering at the sight of that ooey gooey mess.


Tin Foil Dinner/HOBOJOE"S

1lb ground beef
sliced carrots
bag of frozen corn
sliced yellow onion
diced potatoes
can cream of mushroom soup
head of cabbage


I first like to start off by boiling my carrots and potatoes for about 5 min. to soften them up a bit, ( this cuts down on the cooking time). Set out your tin foil (double layer) and start loading it up- a couple of leafs of cabbage, a patty of ground beef, a few carrots, potatoes, some corn, onions, a heaping spoonful of soup and some salt a pepper. Then make the next one. I usually set up an assembly line ( much faster). Then fold it up, I add another piece of tin foil, making sure it is sealed very well. Then put it in the oven at 350 for about 40-50 min. checking to see when meat and veggies are done. I like to serve with ketchup.

The Perfect Indoor Smore

Preheat oven to broil

place 1/2 of a graham cracker down, place 1/4 of the chocolate bar on each graham cracker and a marshmallow on top. Place in oven for about 30 sec. to a min. As soon a marshmallow starts getting bigger take out. Place another 1/2 of graham cracker on top and there you have it. Perfection.

Tuesday, October 5, 2010

Flour Tortilla Fun!

Back during my Super Cool EA days, my friend Gary would come over and make us the yummiest stuff . My favorite was when he made Homemade Tortilla chips. Since then I will occasionally make my own corn tortilla chips, but recently my SIL Suzy introduced me to El Rey's ( from Globe) Flour Tortilla chips. Well they are freaking awesome, so I found out how to make those and made me up a batch . and what better a meal to go with it than Taco Salad in a Homemade Taco bowl! This smart idea was from Mel's Kitchen Cafe. So if you want a super easy way to impress some dinner guests, your husband or kids try this meal.


Taco Salad

Ground beef
Black/Pinto Beans
Lettuce
Tomato
Salsa
Sour cream
Cilantro
Avacado
Cheese
El Pato
Throw this and anything else you can think of into a Bowl and enjoy


Flour Tortilla Chips

1 package flour tortillas cut into strips or triangles

canola/vegetable oil for frying

salt

Let the tortillas dry out for about 10-15 min. in a single layer,before frying. Fry on med-high, they fry very fast. They will need to turn almost immediately after they get dropped in. You want them to brown and bubble up but not to much. Also do not overcrowd the pan. Place them on a paper towel to drain. Sprinkle with salt.

Serve and enjoy - can store in an airtight bag. Even better the second day.

Homemade Taco Tortilla Bowls

*Serves 6

6 burrito-size flour tortillas
Olive oil or Canola oil
6 oven-safe cups or canning jars

Preheat the oven to 400 degrees. On a rimmed baking sheet, place the cups or jars upside down, evenly spacing them to make room for the tortillas that will be draped over them.

Microwave the tortillas for about 30 seconds, until they are soft and pliable. Rub a teaspoon or so of oil on the front and back of the tortilla. I used my fingers so that I could make sure to coat the entire surface of the tortilla. It doesn’t need to be a heavy coating of oil, just enough to help the tortilla crisp up and not stick to the jar or cup. Drape each tortilla over a cup or jar (I found that the tall jelly/jam jars I had sitting in my cupboard worked great, but my friend Lesli uses oven-safe tea cups and gets great results, too). I softly pressed the sides down a bit to help them form more of a bowl shape.

Bake the tortilla bowls for about 8-10 minutes, checking often so they don’t burn, until the tortillas are nicely browned and crisp. Remove the baking sheet from the oven and let the tortillas cool for a few minutes before gently removing them from the cups or jars.

Thursday, August 19, 2010

Sloppy Joes

I have never been a huge fan of the "Sloppy Joe" sandwich. Which is actually a little weird since Ground beef and Onions are one of my favorite combos!
I recently learned this is one of my husbands favorite meals. I have no idea why it took him 8 yrs. to tell me this, but I have decided to try and find the best recipe for it.

I looked all around for one that struck my fancy, I then came upon this little number from Pioneer Woman. I was sure it would not disappoint and I was right.
Other than using Red Bell pepper in place of the Green ( which I find a little bitter) I followed the recipe to a T. Folks it was a winner. and the toasting of the bun is ESSENTIAL!
  • Sloppy Joes
  • 2 Tablespoons Butter
  • 2-½ pounds Ground Beef
  • ½ whole Large Onion, Diced
  • 1 whole Large Green Bell Pepper, Diced--(Or other colored Bell Pepper)-cc
  • 5 cloves Garlic, Minced
  • 1-½ cup Ketchup
  • 1 cup Water
  • 2 Tablespoons Brown Sugar
  • 2 teaspoons Chili Powder (more To Taste)
  • 1 teaspoon Dry Mustard
  • ½ teaspoons Red Pepper Flakes (more To Taste)
  • Worcestershire Sauce To Taste
  • 2 Tablespoons Tomato Paste (optional)
  • Tabasco Sauce (optional; To Taste)
  • Salt To Taste
  • Freshly Ground Black Pepper, To Taste
  • Kaiser Rolls
  • Butter

Preparation Instructions

Add butter to a large skillet or dutch oven over medium high heat. Add ground beef and cook until brown. Drain most of the fat and discard.

Add onions, green pepper, and garlic. Cook for a few minutes, or until vegetables begin to get soft.

Add ketchup, brown sugar, chili pepper, dry mustard, and water. Stir to combine and simmer for 15 minutes, adding salt and pepper to taste. Also add tomato paste, Worcestershire, and Tabasco if desired. Taste and adjust seasonings as needed.

Spread rolls with butter and brown on a griddle or skillet. Spoon meat mixture over the rolls, topping with a slice of cheese if it makes your skirt fly up. Serve hot with kettle cooked chips!


Wednesday, June 30, 2010

Stuffed Shells

I love when I am able to make a meal based off of leftover ingredients from previous meals.
I had some mozarella and ricotta in the fridge, so I took to the Food Blogosphere and came across a super Yummy recipe of Baked Manicotti and homemade pasta sauce from here. I decided to used large shells instead since I just think they are more fun.


The sauce made so much that I was able to freeze half of it. Which is nice for when I need some quick sauce.
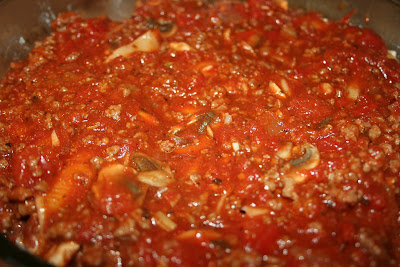
The result was Superb- all the kiddos, my hubby and I all Loved it!


Manicotti / Stuffed Shells

Cheese Filling and Pasta

3 cups part-skim ricotta cheese
4 ounces grated Parmesan cheese (about 2 cups)
8 ounces shredded mozzarella cheese (about 2 cups)
2 large eggs , lightly beaten
3/4 teaspoon table salt
1/2 teaspoon ground black pepper
2 tablespoons chopped fresh parsley leaves (or 2 1/2 teaspoons dried parsley)
2 teaspoons chopped fresh basil (or 1 teaspoon dried basil)
16 no-boil lasagna noodles (I use the Barilla brand – apparently they are supposed to be the most similar to homemade pasta and I love them, both in this and in lasagna)

Adjust oven rack to middle position and heat oven to 375 degrees.

Heat oil, garlic, and pepper flakes (if using) in large saucepan over medium heat until fragrant but not brown, 1 to 2 minutes. Stir in tomatoes, basil and 1/2 teaspoon salt and simmer until thickened slightly, about 15 minutes.

In a medium bowl, combine ricotta, 1 cup Parmesan chese, mozzarella cheese, eggs, salt, pepper, and herbs; set aside.

To assemble, pour 1 inch boiling water into 13 by 9-inch baking dish, then add noodles one at a time. Let noodles soak until pliable, about 5 minutes, separating noodles with tip of sharp knife to prevent sticking. Remove noodles from water and place in single layer on clean kitchen towels; discard water in baking dish and dry baking dish.

Spread bottom of baking dish evenly with 1 1/2 cups sauce. Using soupspoon, spread 1/4 cup cheese mixture evenly onto bottom three-quarters of each noodle (with short side facing you), leaving top quarter of noodle exposed. Roll into tube shape and arrange in baking dish seam side down. (You should be able to fit 8 manicotti in each row, allowing all 16 to fit in the dish). Top evenly with remaining sauce, making certain that pasta is completely covered.

Cover manicotti with aluminum foil. Bake until bubbling, about 40 minutes, then remove foil. Sprinkle manicotti evenly with remaining 1 cup Parmesan. Bake until cheese is browned and bubbly, about 6-7 minutes. Remove from oven and let sit for 15 minutes before serving.

The manicotti can be prepared right up until the baking step then covered with a sheet of parchment paper, wrapped in aluminum foil, and refrigerated for up to 3 days or frozen for up to 1 month. (If frozen, thaw the manicotti in the refrigerator for 1 to 2 days.) To bake, remove the parchment, replace the aluminum foil, and increase baking time to 1 to 1 1/4 hours.

* if using shells prepare the same. boil shells until pliable then let them cool off, spoon mixture inside and cover with sauce.


Divine Spagetti Sauce

3 tablespoons olive oil
2 cups onion, chopped and divided
1 red pepper, coarsely chopped
2 pounds hamburger (at least 90% lean)
5 cloves garlic, finely chopped
1 12 oz. can tomato paste
1 teaspoon kosher salt
1 teaspoon black pepper
3 teaspoons dried oregano
3 teaspoons dried basil
1 1/2 teaspoons dried thyme
2 14-oz. can Italian-style diced tomatoes
2 28-oz. can crushed tomatoes
1 carton fresh mushrooms (optional)
1 1/2 cups beef stock or beef broth
2 tablespoons brown sugar
2 bay leaves
2 tablespoons balsamic vinegar

Heat olive oil over medium high heat. Add 1/2 of the onions and saute until translucent and slightly browned. Add garlic and stir constantly for 1 minute. Add beef and cook until no red is showing. Drain beef slightly. Blend up the remaining onions and red pepper in a blender or food processor until mostly smooth. Add mixture to the garlic, onions and beef and stir to combine, cooking for another minute. Add tomato paste and spices and cook for 1 minute, stirring until combined. Add tomatoes, beef broth and sugar (and mushrooms, if using). Stir until combined and add the bay leaves. Bring to a boil and then reduce to low and simmer for 1 hour, stirring occasionally. Fifteen minutes before serving, stir in the balsamic vinegar.

NOTE: The sauce will seem watery at first but will reduce to perfection after simmering for an hour. I’ve let it simmer on the stove for up to three hours before with no problems.

*Freezable Meal: The finished spaghetti sauce freezes very well. I store mine in a freezer-safe container. To serve, I thaw in the refrigerator (usually about one day) and reheat over medium-low heat in a saucepan on the stove.

Monday, June 28, 2010

Fry Bread

I have always Loved Fry Bread/Navajo Tacos, and even though my husband isn't a big fan, I still love making it. I love it Sweet with honey and butter or savory, stacked with meat, beans and the works. You may already have a recipe for the fry bread that you LOVE, if so keep on using it, if not try this one I really enjoyed it.


Indian Fry Bread

4 cups flour

2 tbsp. baking powder

1 tsp. salt

1/2 cup shortening

1 cup warm water

Mix flour, baking powder and salt. Gradually add in the shortening and water. Add only enough water to make dough stick together. Knead dough until smooth, make into fist-sized balls. Cover them with a towel for 10 minutes then pat them out into circles about the size of a pancake. Fry in hot cooking oil in cast iron skillet until brown on both sides. Drain on paper towels.


Monday, April 12, 2010

Make your own Take-Out- Fontina Burger

I like to think of myself as a "food connoisseur" (yes I had to look up the spelling of that).
Always out to find the next best thing, and always up to try something different. I love sharing my love of food as well and introducing people to new places and good food.
One of my fav. places is Joes Farm Grill with is one side of the Joes Trinity- Joes Farm, Joes BBQ and Liberty Market. All of which are my favorites of the specific food style.
I will even wait in line for an hour to get a Free Hamburger! Course with me it is just as much about the Free as it is about the Food.
Now onto the meal.... My favorite menu item at Joes Farm Grill is the Fontina Burger. It was my fav. even before it was featured on Diners Drive-ins and Dives (another favorite show of mine).
So I decided to re-create this masterpiece of a Burger.

of course I would never get anything at Joes without their Fabulous Sweet Potato Fries- these are killer and MUST be tried.

I got some great baby portobella mushrooms and sauteed them up a bit
some Fontina cheese - which took me awhile to find. Trader Joes is where I ended up getting most of my ingredients
Some pesto and arugala

Then put it all together with some Roasted Red Pepper and a great grilled patty of Ground Beef to create this beauty.

It was a Hit! I loved it as did my mom and husband. All those same great flavors melted together to produce a symphony in my mouth. I inhaled it and then had it for leftovers 2 days in a row.
*All those ingredients cost me so much I had to get my money's worth.
So while it is cheaper to make a single burger at home- you still have to buy all the ingredients for about 6 burgers so the price can get a little high. But if you are looking to impress, this meal will definitely do it.
If you don't want to take the time and effort I would just go down to Joe's and have them make it for you. (Their fries were much better than mine anyways!)


Thursday, March 11, 2010

Spicy Mini Meatloaves

In my quest to find a great Meatloaf recipe, I happened upon this little find. It came from a Biggest Loser episode where Tara and her mom were cooking. Now the first time I made it I didn't have the "Chipotle in Adobo" this time I tried it with it ( using only about a 1/4 of what it called for) and man was it Tasty! Though it was too spicy for the kiddos, they did not enjoy it. But I thought it was absolutely amazing, the flavor was incredible and I loved the crunchy bits of veggies in every bite. I think next time I will do half with the chipotle and half without.
*Bonus this recipe when made with fat free ketchup, egg whites and lean ground turkey breast is only 110 calories a patty!

Here is my adaptation of the recipe.

Mini Meatloafs

1 1/2 lbs. ground beef or turkey
1/2 an onion
1/2 red bell pepper
1 carrot
1/2 C. quick cooking oats
1 egg
1 egg white
1/2 of a 4oz can chipotle in adobo
ketchup

Finely chop all veggies and chipotles. Then mix all ingredients together by hand. Form into balls and put into muffin tins, drizzle with ketchup. Bake at 350 degrees for 25-30 min.
* if made with ground turkey breast, egg whites, and fat free ketchup- each individual patty is only 110 calories


Tuesday, February 23, 2010

Just Plain Stuffed!

Since as I was a little girl I have been going to visit my Dad's family in Pennsylvania. One of my favorite memories of my Great Grandma Ann is her Stuffed Cabbage. It is a Ruttinger family favorite. I even have video of her teaching my dad how to make it. (she was the cutest little grandma ever) After I got married I learned how to make it and have been perfecting it ever since. My family has also developed a love for it as well.

Now this may sound like something you may not want to try, but please give it a chance. It is such a yummy comfort food, try making it just once and I am almost positive you will like it (if you like ground beef and rice that is)
Start it off by boiling a head of cabbage, once it starts coming apart take it out, and lay the leaves out to dry.

Then make some rice and add it to some ground beef ( and a little sausage) along with an egg, salt and pepper and a little garlic powder. ( you want more meat than rice or it will be too dry)
then put a little bit of mixture into a leaf and roll it up like a burrito
It should look something like this.

Then add the sauce and remaining cabbage on the top
I had my Uncle, and Grandpa over last night and they devoured it, as did everyone else.
So Hip Hip Hooray for Stuffed Cabbage!!!!


Stuffed Cabbage

1 large head of cabbage(boiled and dried)
1.5 lbs of ground beef ( cooked and drained)
a little bit of cooked sausage ( if you like)
1 1/2 C. of cooked rice
2 small cans of tomato sauce
1 can of tomato soup
garlic powder & salt & pepper to taste
1 egg

In a large pot of boiling water put in a whole head of cabbage (cored) when it the leaves start to come off take it out, let it cool and then lay the leaves out on a towel to dry. While they are drying start cooking rice. Then brown the meat. When they are both done put meat, rice in a bowl with an egg, salt,pepper & garlic powder to taste. Next in a bowl mix the sauce and soup with a little bit of water to thin it out a bit. Then scoop some of the meat mixture into a leaf and roll up like a burrito. Place in casserole dish ( with a little bit of sauce on the bottom) continue rolling leaves. After done sprinkle any leftover cabbage on top then pour sauce over it. Cook for about 60-90 min. at 350degrees. Serve with some good bread and Enjoy.
Related Posts Plugin for WordPress, Blogger...